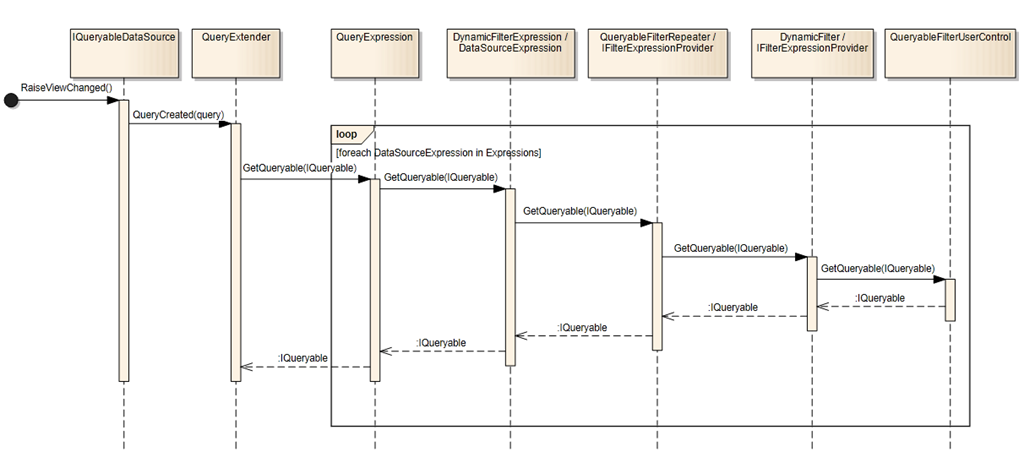
Recently, I stumbled upon Brad Wilson’s post - Anatomy of a Prompt (PowerShell) and decided that I also want to have a fancy-looking command prompt for a cmd.exe. Fanciness includes but not limited to:
- A custom prompt that display computer name and current user, git status, and features pretty looking powerlines
- Persistent commands history
- Command completion, aliases/macros support + their expansion on demand
This is what my console looks like after all modifications:
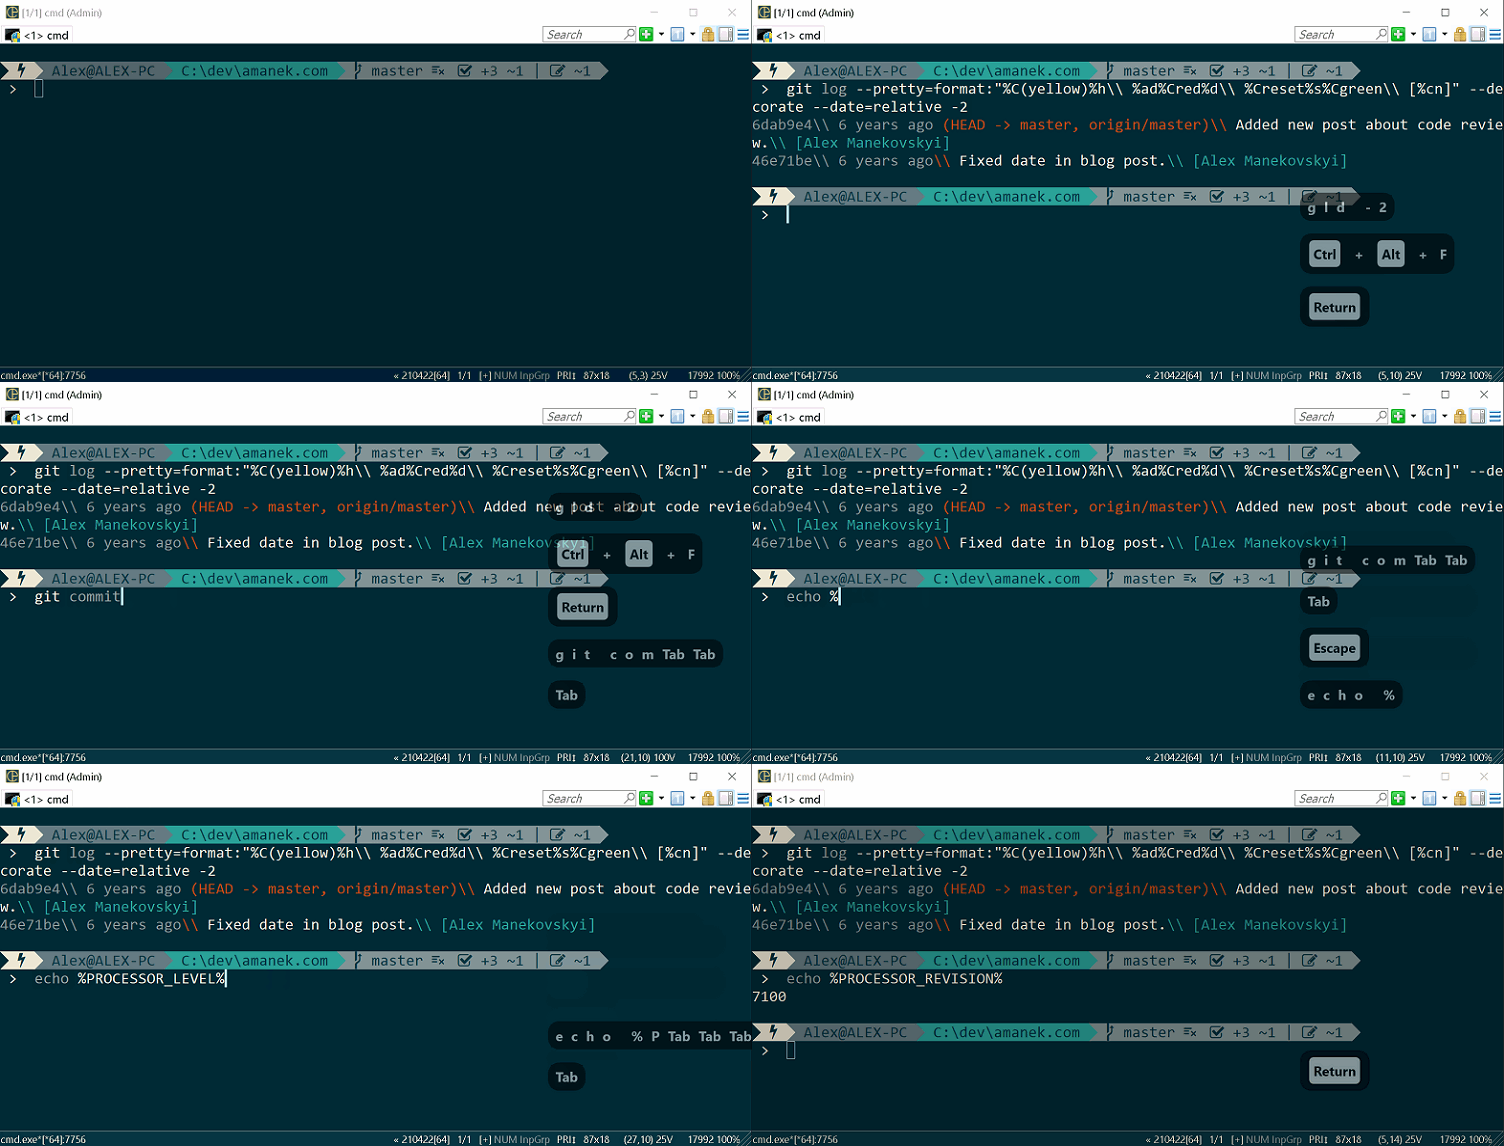
At first, I was planning to give an overview of my current setup, but then the description grew, and now I have a detailed guide about how to improve the look and feel of the CMD.
Table of contents:
- Set Command Aliases/Macros For CMD.exe In ConEmu
- Integrate Clink
- Change The Prompt With Oh My Posh
- Conclusions
Set Command Aliases/Macros For CMD.exe In ConEmu
For many years I have been a loyal and happy user of ConEmu. This tool is great - it is reliable, fast, and highly configurable. ConEmu has a portable version, so setup replication is not a problem - I keep it in the ever-growing list of utilities on my cloud storage.
One of the issues with cmd is the absence of persistent user-scoped command aliases or macros. Yes, there is a DOSKEY command, but you are required to integrate its invocation into your cmd startup. To get more control over my macros setup, I wrote a utility (GitHub - manekovskiy/aliaser) that pulls a list of command aliases from the file and sets them up for the current process.
ConEmu provides native support for command aliases; refer to ConEmu | Settings › Environment page for more details.
My setup is following:
- Put compiled aliaser.exe and a file containing aliases (my list - GitHub - aliases.txt) to the
%ConEmuBaseDir%\Scriptsfolder. - Add a batch file containing the invocation of the aliaser utility to the
%ConEmuBaseDir%\Scriptsfolder.
1 2 | |
- Update ConEmu CMD tasks to include setup-aliases.cmd invocation. Example:
cmd.exe /k setup-aliases.cmd
There is no need to provide a path to the batch file because the default ConeEmu setup adds a
%ConEmuBaseDir%\Scriptsfolder to the PATH environment variable.
Integrate Clink
Another great addition to the cmd is a Clink - it augments the command line with many great features like persistent history, environment variable names completion, scriptable keybindings, and command completions.
Again, ConEmu provides integration with Clink (see ConEmu | cmd.exe and clink). It is important to note that ConEmu works well only with the current active fork of the clink project - chrisant996/clink.
In short, to install and enable Clink in ConEmu, you should extract the contents of the clink release archive into the %ConEmuBaseDir%\clink and check the “Use Clink in prompt” under the Features settings section.
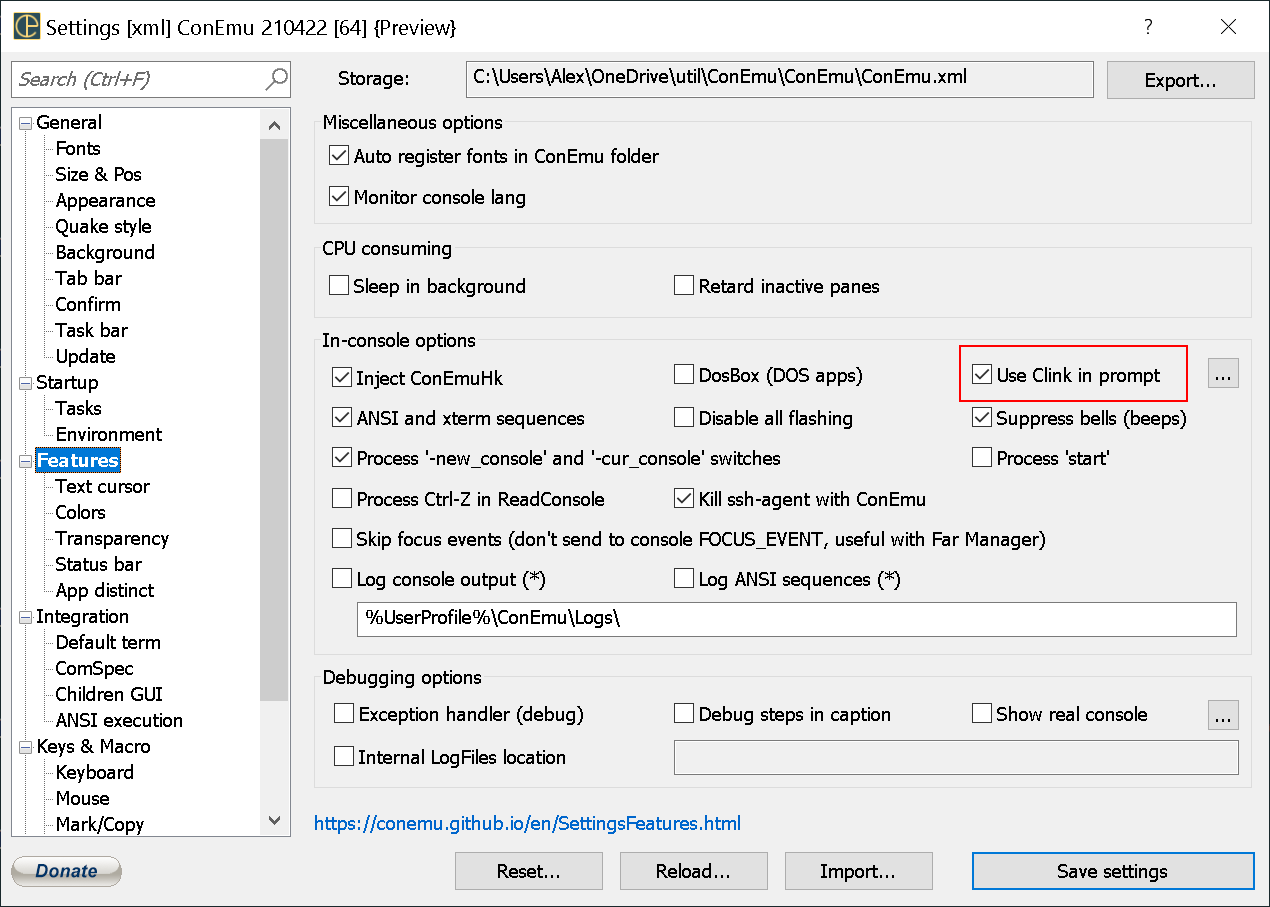
An indicator of successful integration is the text mentioning the Clink version and its authors, similar to the following:
Clink v1.2.9.329839
Copyright (c) 2012-2018 Martin Ridgers
Portions Copyright (c) 2020-2021 Christopher Antos
https://github.com/chrisant996/clink
Configure Clink Completions
One of the most powerful features of the Clink is that it is scriptable through Lua. It is possible to add custom command completion logic, add or change the keybindings or even modify the look of the prompt.
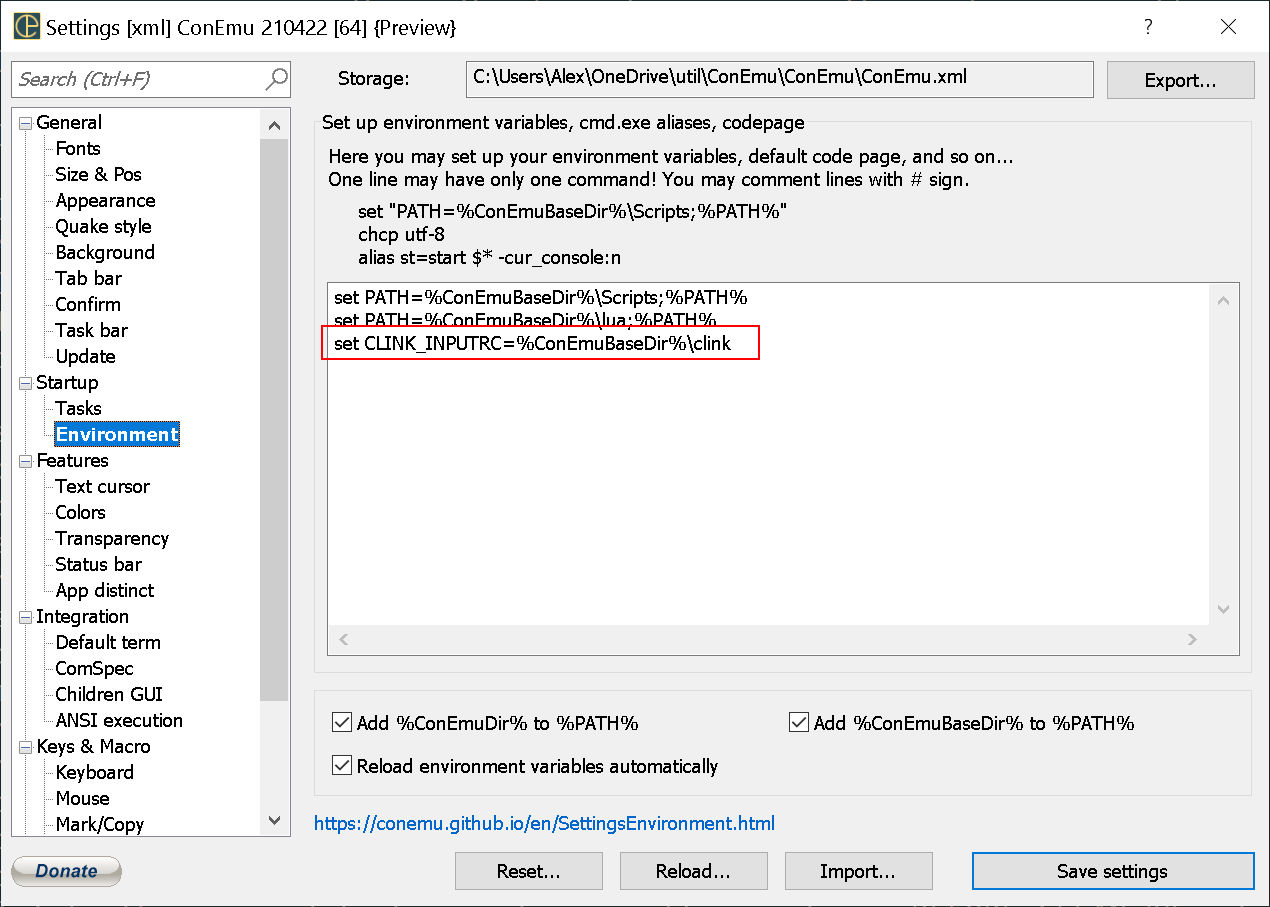
On startup, Clink looks for a clink.lua script, which is an entry point for all extension registrations. There are a couple of places where Clink tries to locate the file, one of them is the %CLINK_INPUTRC% folder. There should be an empty clink.lua file in the %ConEmuBaseDir%\clink folder (comes as a part of the Clink release). To make it visible to ConEmu and Clink, add a CLINK_INPUTRC variable to the ConEmu Environment configuration: set CLINK_INPUTRC=%ConEmuBaseDir%\clink.
Not so long ago, I found that Cmder (a quite opinionated build of ConEmu) distribution already contains Clink and completion files for all super popular command-line utilities. A little bit of search showed that completions in Cmder come from the GitHub - vladimir-kotikov/clink-completions repository.
Download the latest available clink-completions release and unpack it in the %ConEmuBaseDir%\clink\profile. I decided to drop the version number from the clink-completions folder name, so I would not have to update the registration script every time I update the completions. I also made the registration of the Clink extensions maximally universal. I went with a convention-based approach to files and folders organization:
- Each Clink extension should be put into a separate folder under
%ConEmuBaseDir%\clink\profile. This ensures proper grouping and logical separation of scripts. - Each Clink extension group should define a registration script under
%ConEmuBaseDir%\clink\profile. - Code in
clink.luashould locate all registration scripts under%ConEmuBaseDir%\clink\profileand unconditionally execute them.
Example folder structure:
📂 %ConEmuBaseDir%\clink
  📂 profile
    📁 clink-completions
    📁 extension-x
    📁 oh-my-posh
    📄 clink-competions.lua
    📄 oh-my-posh.lua
    📄 extension-x.lua
  📄 clink.lua
The registration script is simple:
1 2 3 4 5 6 7 8 9 10 11 12 13 | |
The clink-completions registration script is also a barebone minimum. I extracted it from the Cmder’s clink.lua:
1 2 3 4 5 6 7 8 9 10 11 12 13 14 15 16 | |
Change The Prompt With Oh My Posh
If you never heard of it before, Oh My Posh is a command prompt theme engine. It was first created for PowerShell, but now, in V3, Oh My Posh became cross-platform with a universal configuration format, which means that you can use it in any shell or OS.
ConEmu distribution contains an initialization script file - CmdInit.cmd, which can display the current git branch and/or current user name in the command prompt (see ConEmu | Configuring Cmd Prompt for more details).
When it comes to CMD, Oh My Posh could be integrated through Clink. Clink has a concept of prompt filters - code that executes when the prompt is being rendered.
Installation and integration with Clink steps are very straightforward:
- Download the latest release
- Move the executable to the
%ConEmuBaseDir%\clink\profile\oh-my-posh\binfolder - Add oh-my-posh.lua script to the
%ConEmuBaseDir%\clink\profilefolder - Create a theme file (I named mine amanek.omp.json)
Following is the expected folder structure:
📂 %ConEmuBaseDir%\clink
  📂 profile
    📂 oh-my-posh
      📂 bin
        📦 oh-my-posh.exe <-- note, that I renamed the executable file to oh-my-posh.exe.
      🎨 amanek.omp.json
    📄 oh-my-posh.lua
  📄 clink.lua
The registration script was inspired by the Clink project readme file:
1 2 3 4 5 6 7 8 9 10 11 | |
The Oh My Posh comes with a wide variety of prebuilt themes. The customization process is well described in the Override the theme settings documentation section.
Here is the link to my theme file - GitHub - amanek.omp.json. It includes the following sections:
- Indicator of elevated prompt. Displays a lightning symbol if my console instance is running as Administrator.
- Logged-in user name and computer name. I frequently connect to different machines over RDP, so it is good to know where am I right now 😊
- Location path
- Git status
One of the issues I encountered during the command prompt customization process is that ConEmu remaps console colors and replaces them with its own color scheme:
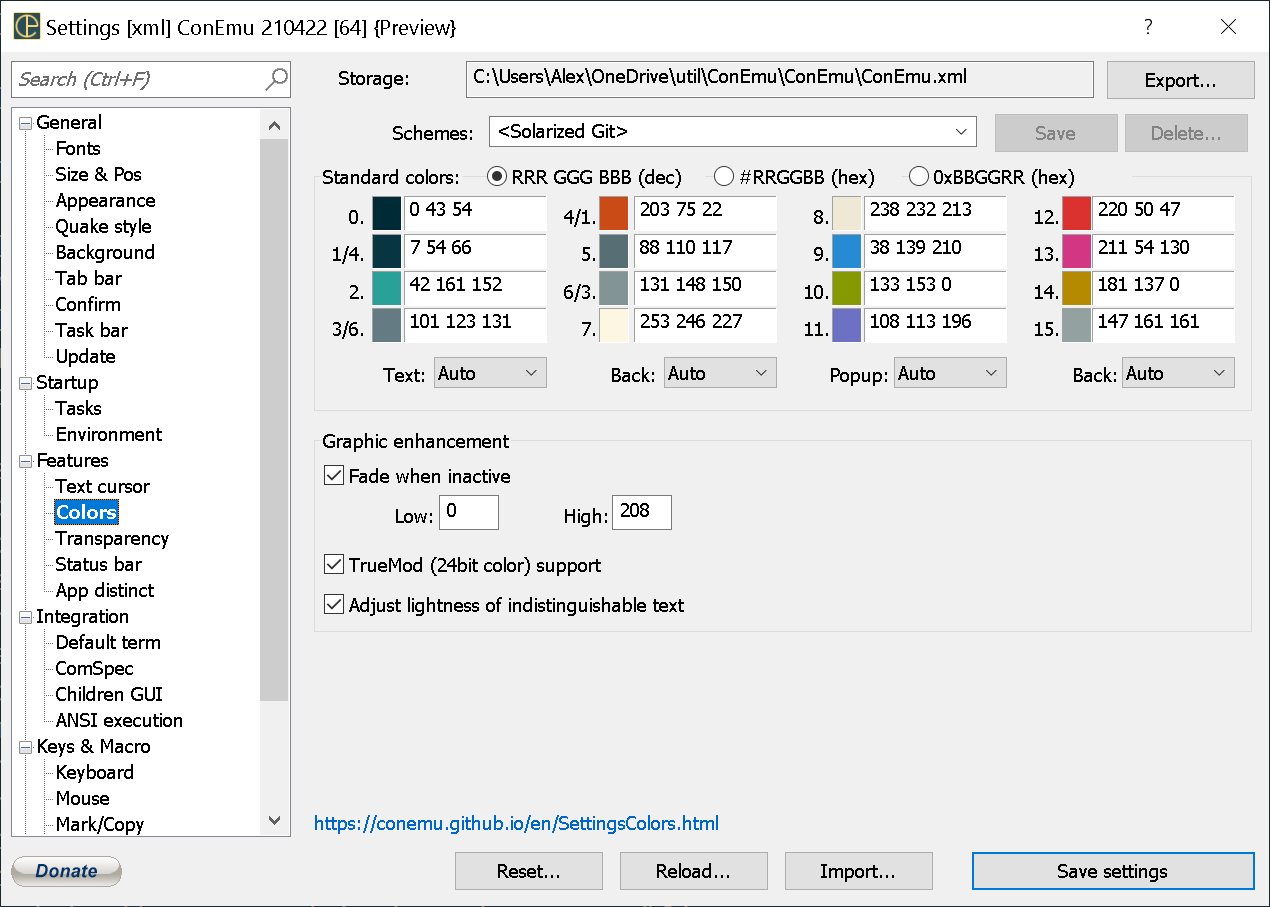
As you can see, ConEmu uses a color scheme based on the 16 ANSI colors. Fortunately, in Oh My Posh, it is also possible to specify color using one of the well-known 16 color names (see standard colors documentation section). Here is the “ConEmu color number to Oh My Posh color name” conversion table:
| Number | Color |
|---|---|
| 0 | black |
| 1/4 | blue |
| 2 | green |
| 3/6 | cyan |
| 4/1 | red |
| 5 | magenta |
| 6/3 | yellow |
| 7 | white |
| 8 | darkGray |
| 9 | lightBlue |
| 10 | lightGreen |
| 11 | lightCyan |
| 12 | lightRed |
| 13 | lightMagenta |
| 14 | lightYellow |
| 15 | lightWhite |
Another thing that did not work for me right away was fonts. To render powerlines and icons, Oh My Posh requires the terminal to use a font that contains glyphs from the Nerd Fonts. Nerd Fonts readme contain links to the patched and supported fonts with permissive licensing terms.
The font that I prefer to use was not on the list, so I had to patch it manually. The process is following:
- Clone Nerd Fonts repository
- Install Font Forge and Python
- Copy font file to a separate folder
- In the terminal, navigate to the Nerd Fonts repo root and run the following command
1
| |
More detailed instructions here - Nerd Fonts | Patch Your Own Font.
The Nerd Fonts repository is heavy, and I recommend doing a shallow clone with –depth 1 option.
Conclusions
The amount of work people put into the open-source projects I mentioned is astounding. I was also pleasantly surprised with the quality of tools and customization options available for CMD. Never before my terminal window was so aesthetically pleasing and functionally rich. Now I feel more inspired to continue experimenting with my setup and hope that this guide helped to improve your console experience.
Good luck and happy hacking!
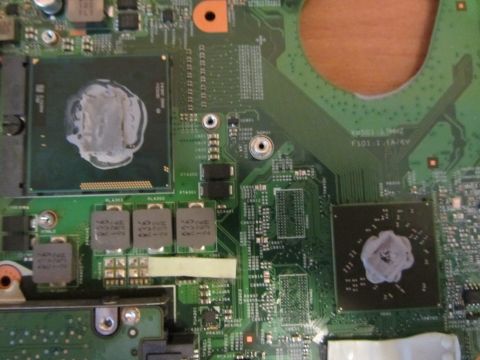
 I own Dell Inspiron N5110 which has Intel Core i7-2670QM CPU and NVidia GeForce GT 525M dedicated GPU. Browsing over the Internet showed that I’m not the only one with such issue. But there was no consistent/believable explanation/guide of why laptop started overheating and how to fix it. One part of the community was just blaming Dell’s greediness and/or cooling system which was not designed for such powerful CPU as i7 and another was suggesting to replace the thermal grease and through the power management controls decrease max speed of the CPU. I already knew how to disassemble my laptop (previously I had to replace my stock HDD which is not fast or easy operation when you own a Dell laptop) so I’ve decided to replace the thermal grease first and then try to understand and maybe even fix engineering blunders in cooling system.
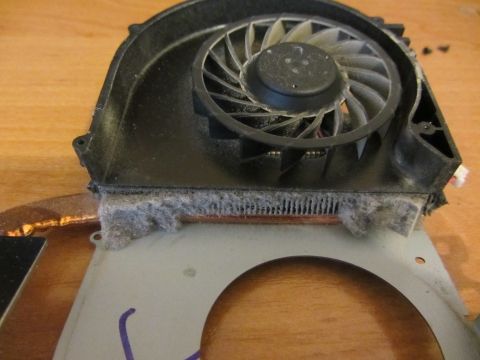
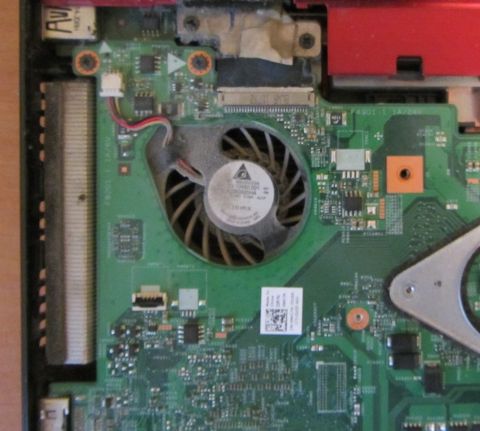
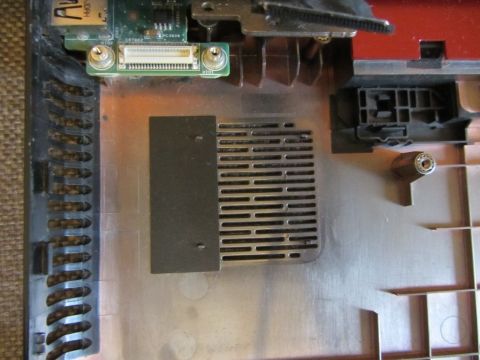
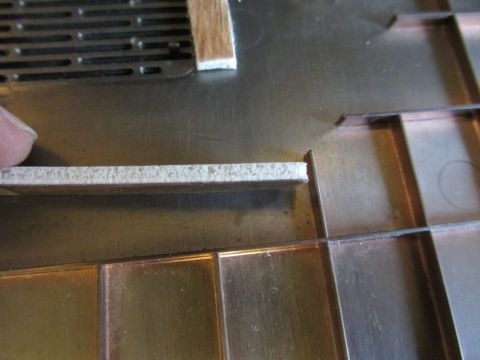
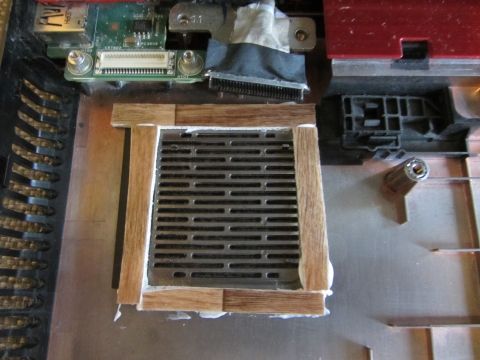
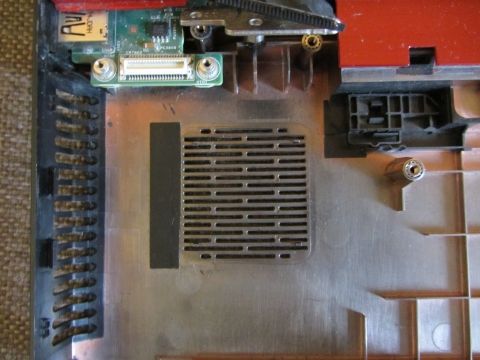 2. There was a gap of 7mm (~0.25") between the motherboard and the grid so I’ve made a compactor from the little piece of linoleum. I’m sure something thick enough like a piece of foam rubber would also work as the idea is to streamline the air intake and do not allow the hot air from the laptop to be taken again.

 Almost a year ago when I started using
