Last summer I started experiencing issues when working on CPU bound tasks on my laptop. At first I thought that the main cause was the summer heat - it was 30°C (86°F) at the time when I first noticed my laptop automatically shut down because of overheating. But then when temperature went down and occasional shutdowns didn’t stopped I understood that I have a real problem.
 I own Dell Inspiron N5110 which has Intel Core i7-2670QM CPU and NVidia GeForce GT 525M dedicated GPU. Browsing over the Internet showed that I’m not the only one with such issue. But there was no consistent/believable explanation/guide of why laptop started overheating and how to fix it. One part of the community was just blaming Dell’s greediness and/or cooling system which was not designed for such powerful CPU as i7 and another was suggesting to replace the thermal grease and through the power management controls decrease max speed of the CPU. I already knew how to disassemble my laptop (previously I had to replace my stock HDD which is not fast or easy operation when you own a Dell laptop) so I’ve decided to replace the thermal grease first and then try to understand and maybe even fix engineering blunders in cooling system.
Running ahead of the story I want to say that I’ve successfully accomplished both tasks and reduced overall temperature of my CPU by 20°C (68°F) resulting in stable 50°C (122°F) when idle and 85-90°C (185-194°F) under continuous 100% load.
Step 1: Clean the dust and replace the thermal grease
The things you’ll need:
- The thermal grease. For those who is interested I was using Zalman ZM-STG2.
- The Dell Inspiron N5110 Service Manual. This is a “must” if you never saw the “innards” of your laptop. You’ll have to follow the steps from “Removing the Thermal-Cooling Assembly” section (see page 75). Friendly tip: print pages with necessary steps as it is hard to remember everything when disassembling laptop for the first time.
I’m sure that there are also plenty of video guides showing how to do this, but being a bit of old school I prefer reading over watching so I cannot recommend any video guide.
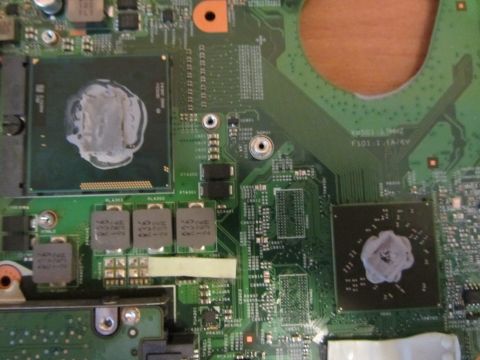
It turned out that stock thermal grease became rock solid and was no longer able to do its work. I used a 70% isopropyl alcohol to remove it.
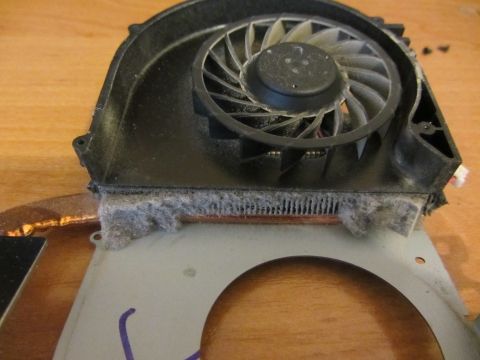
The fan was also full of dirt. The sad fact is that you cannot open fan case without removing the whole cooling system. This means that every time you want to clean it from dirt and dust you’ll have to replace the thermal grease.
So after I’ve replaced the thermal grease and cleaned the fan the CPU temperature decreased by around 15°C (59°F). That was a big win.
Step 2: Fix the airflow inside the cooling system
After two weeks I decided to try to make air flow inside the laptop more streamlined. First thing I did - closed the hole in motherboard with a piece of thick paper. The idea was to minimize the amount of hot air going under my keyboard which sometimes was making it too hot to work with it normally.
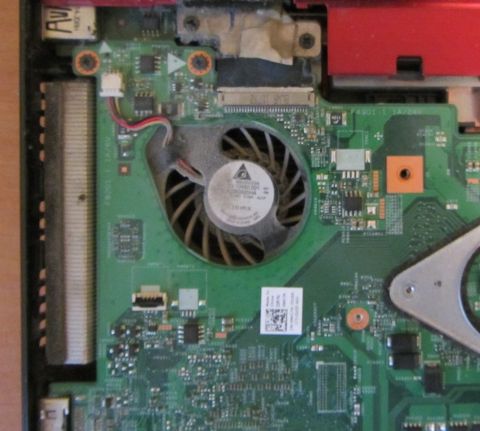
Secondly I decided to fix the air intake. From my point of view it has two issues:
- For some reason a piece of plastic was covering the 25% of the air intake grid. So I’ve just cut it away with the paper knife.
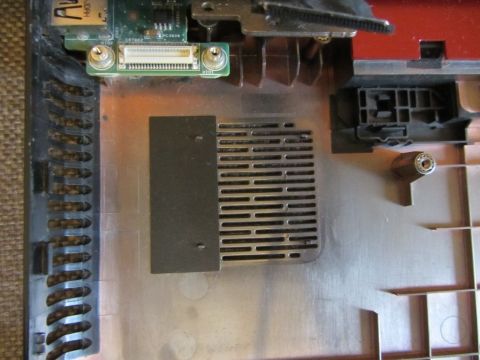
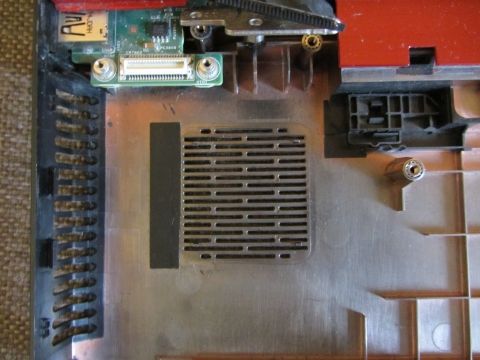 2. There was a gap of 7mm (~0.25") between the motherboard and the grid so I’ve made a compactor from the little piece of linoleum. I’m sure something thick enough like a piece of foam rubber would also work as the idea is to streamline the air intake and do not allow the hot air from the laptop to be taken again.
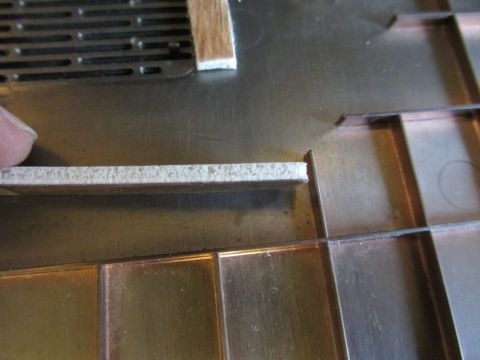
I just glued the pieces of linoleum to the laptop case and made something that looks like a well.
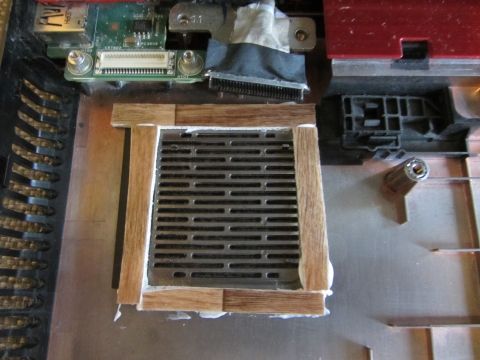
This gave me a little improvement of around 4-5°C (41°F). Not much but still better than nothing.
Conslusions
Replacement of the thermal grease and cleaning of the fan from dust is a must if you want to fix the overheating issues. Attempts to improve the air intake could also help to lower the temperature but not much.
Anyways you will not lose anything from trying to make things better.
Good luck!